With the Firefox browser, you can easily configure a proxy server directly within the settings—quick and convenient, no additional tools required.
First, make sure Firefox is installed on your device. If you haven’t installed it yet, you can click here to view and download it. Once you’re ready, just follow the steps below.
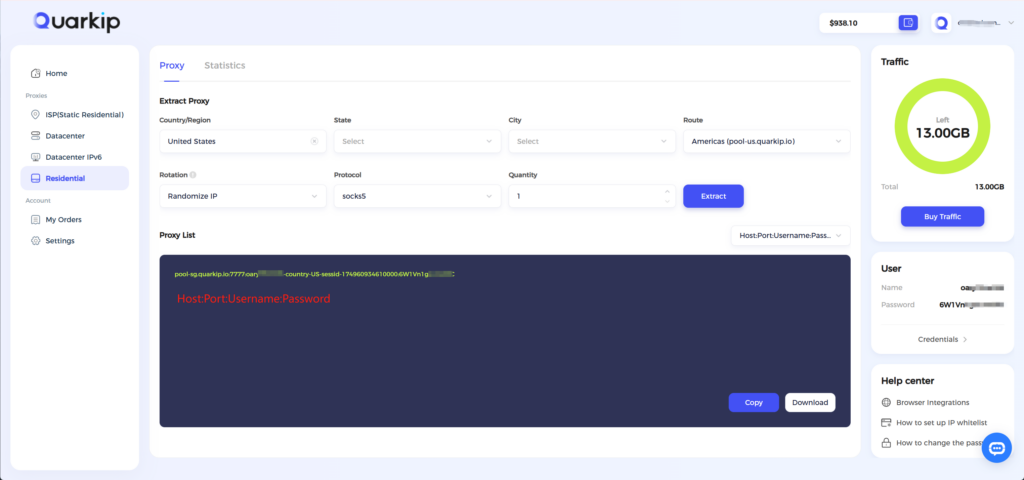
1.Purchase a dynamic residential proxy from QuarkIP and complete the necessary setup. Then, click the “Extract” button. This guide uses a U.S. dynamic residential proxy as an example
- Country/Region:Select the proxy’s country. Choose “Global Mix” for random international rotation
- State (Optional):The proxy’s state/province. Leave blank for random rotation within the selected country
- City (Optional):The proxy’s city. Omit for broader location selection
- Route:Automatically selects optimal routes based on your region
- Rotation
- Sticky IP: Maintains the same IP for ~30 minutes
- Randomize IP: Changes IP with every request Choose based on your use case
- Protocol:Supports both SOCKS5 and HTTP
- Quantity:Select multiple proxies only if needed (e.g., for configuring multiple browser profiles). Otherwise, 1 is sufficient
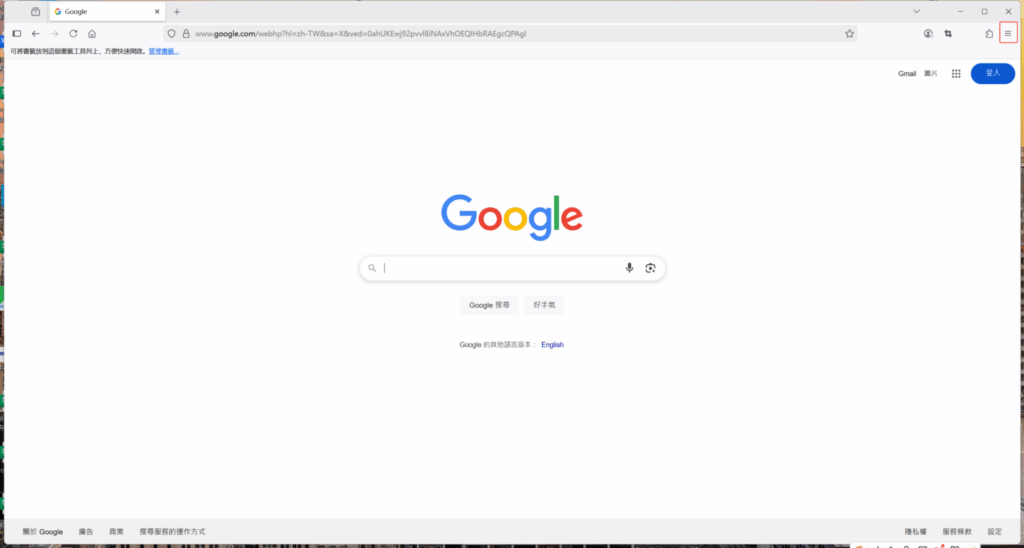
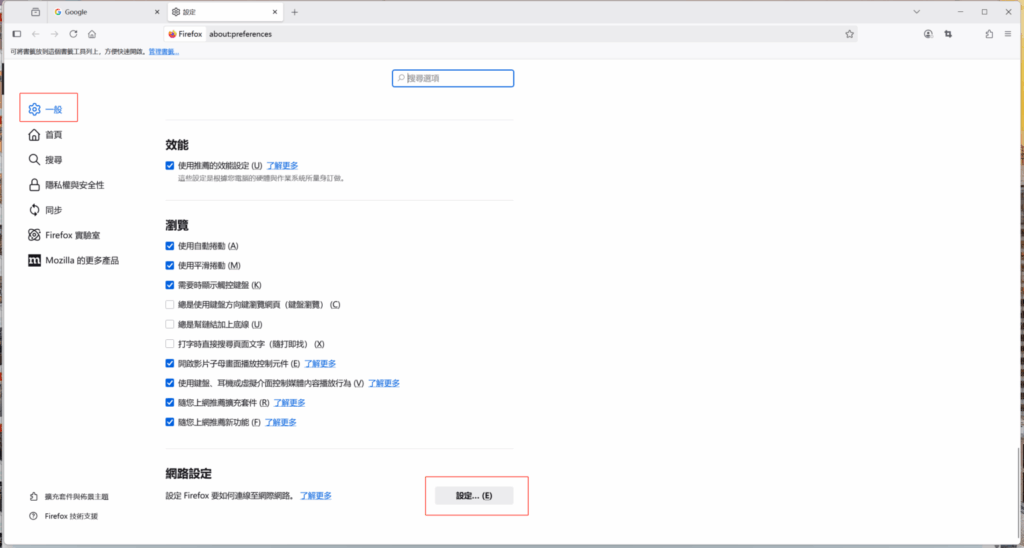
2.Open the Firefox browser and click the settings icon on the right-hand side
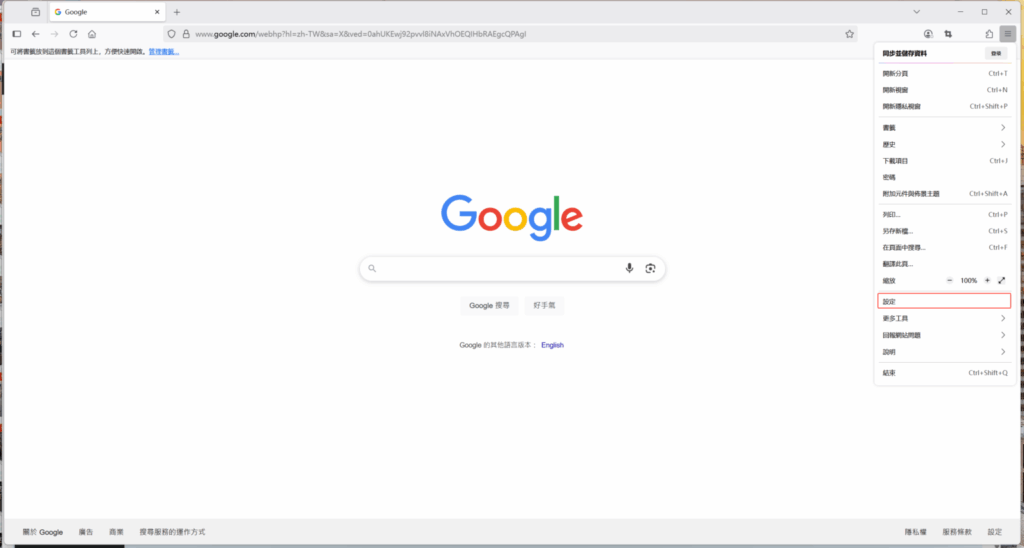
3.In the settings panel, click on Settings
4.Scroll to the bottom of the General section and click the Settings button under Network Settings.
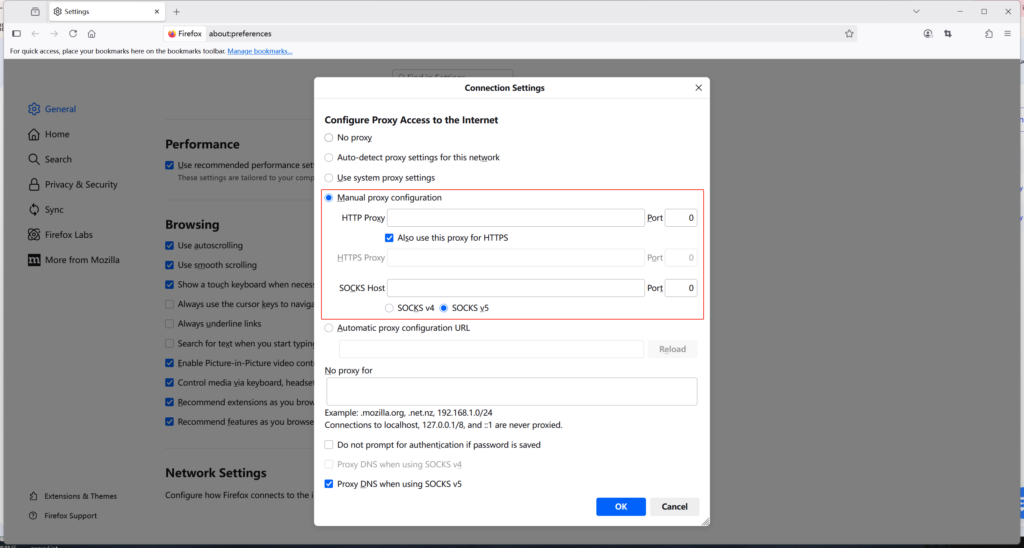
5.Enter the host and port of the dynamic residential proxy into the corresponding input fields. Make sure they match the correct protocol—for example, if the proxy uses the HTTP protocol, fill in the “HTTP Proxy” field.
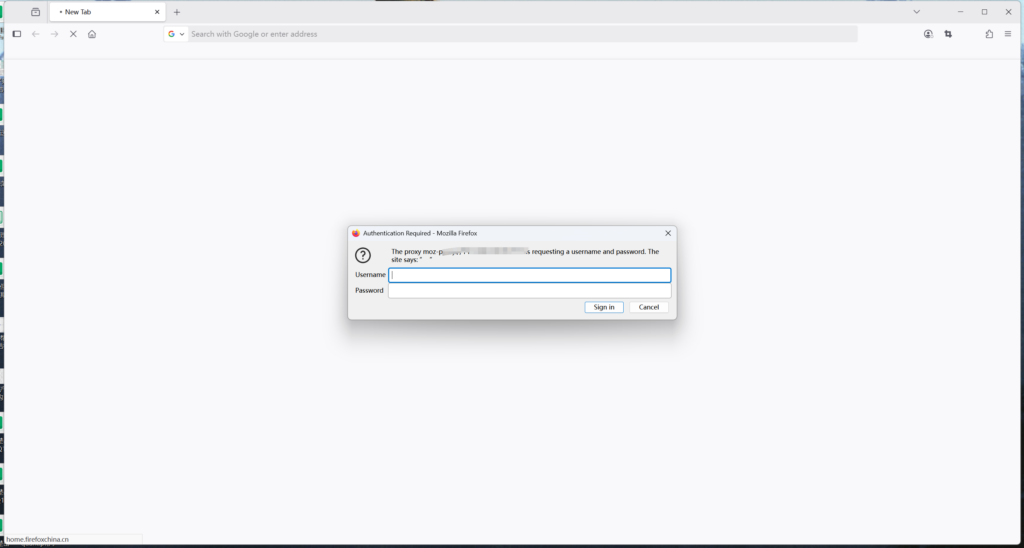
6.Before connecting to the internet, Firefox will prompt you to enter a username and password. Enter the username and password provided by QuarkIP into the corresponding fields
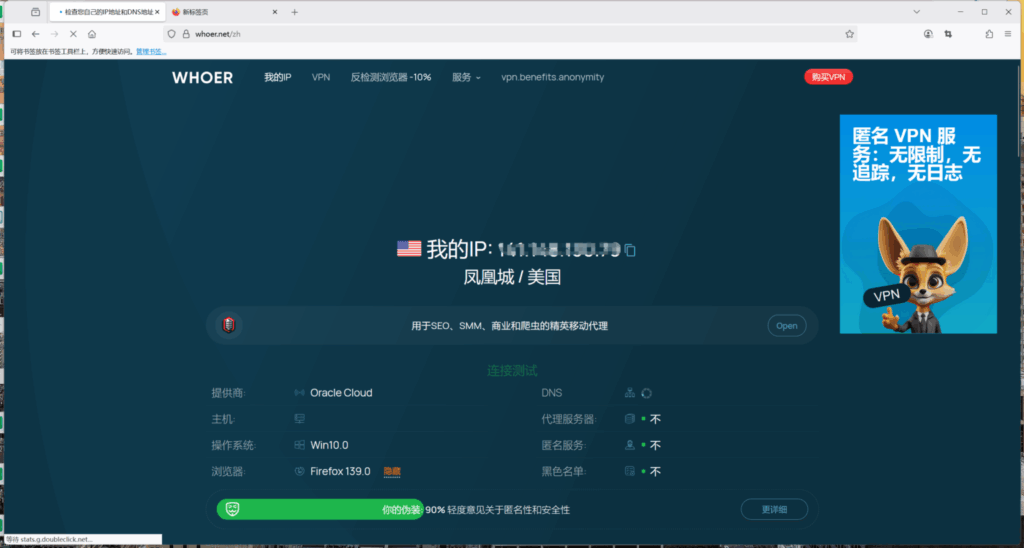
7.Open an IP checking website to verify that the IP location is correct. Once confirmed, you can start using the proxy in Firefox. The specific IP address may change depending on whether you’re using a sticky or rotating proxy mode